How to start with Visual Studio Code
How to start with Visual Studio Code
Linux Solution
Environment
Ubuntu 22.04
Visual Studio Code 1.96.2
Install the requirements
sudo apt -y install cmake
sudo apt -y install ninja-build
Install Visual Studio Code
Follow the Ref. 2.
Clone ns-3 project
git clone https://gitlab.com/nsnam/ns-3-dev.gitOpen Visual Studio Code and do some configurations
Install some plugins:
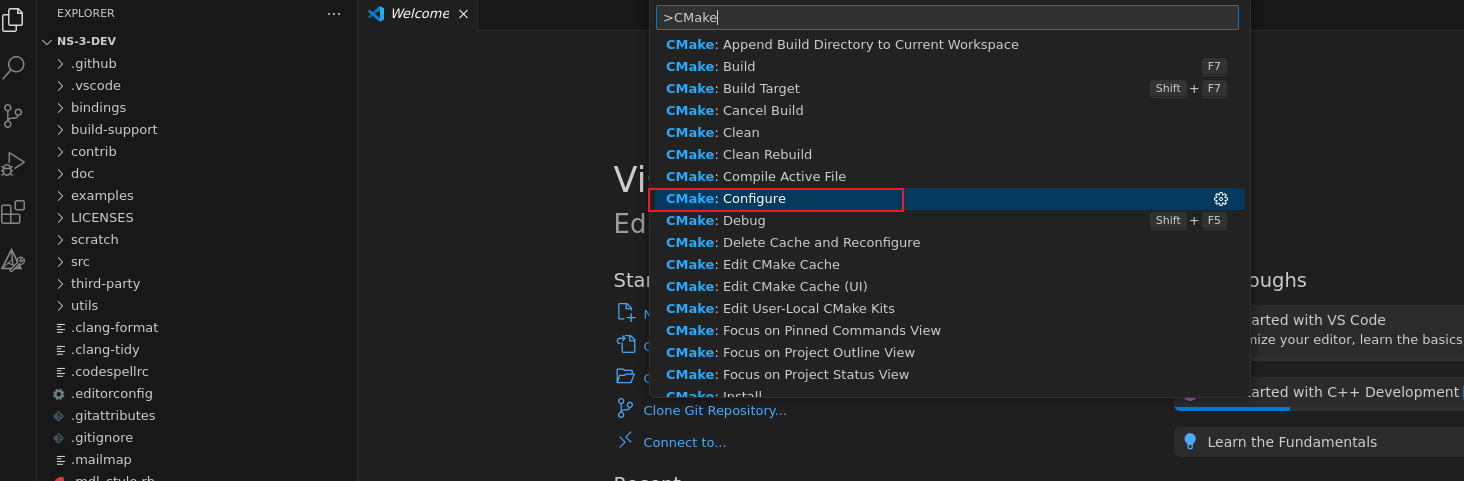
Open ns-3 project and configure it.
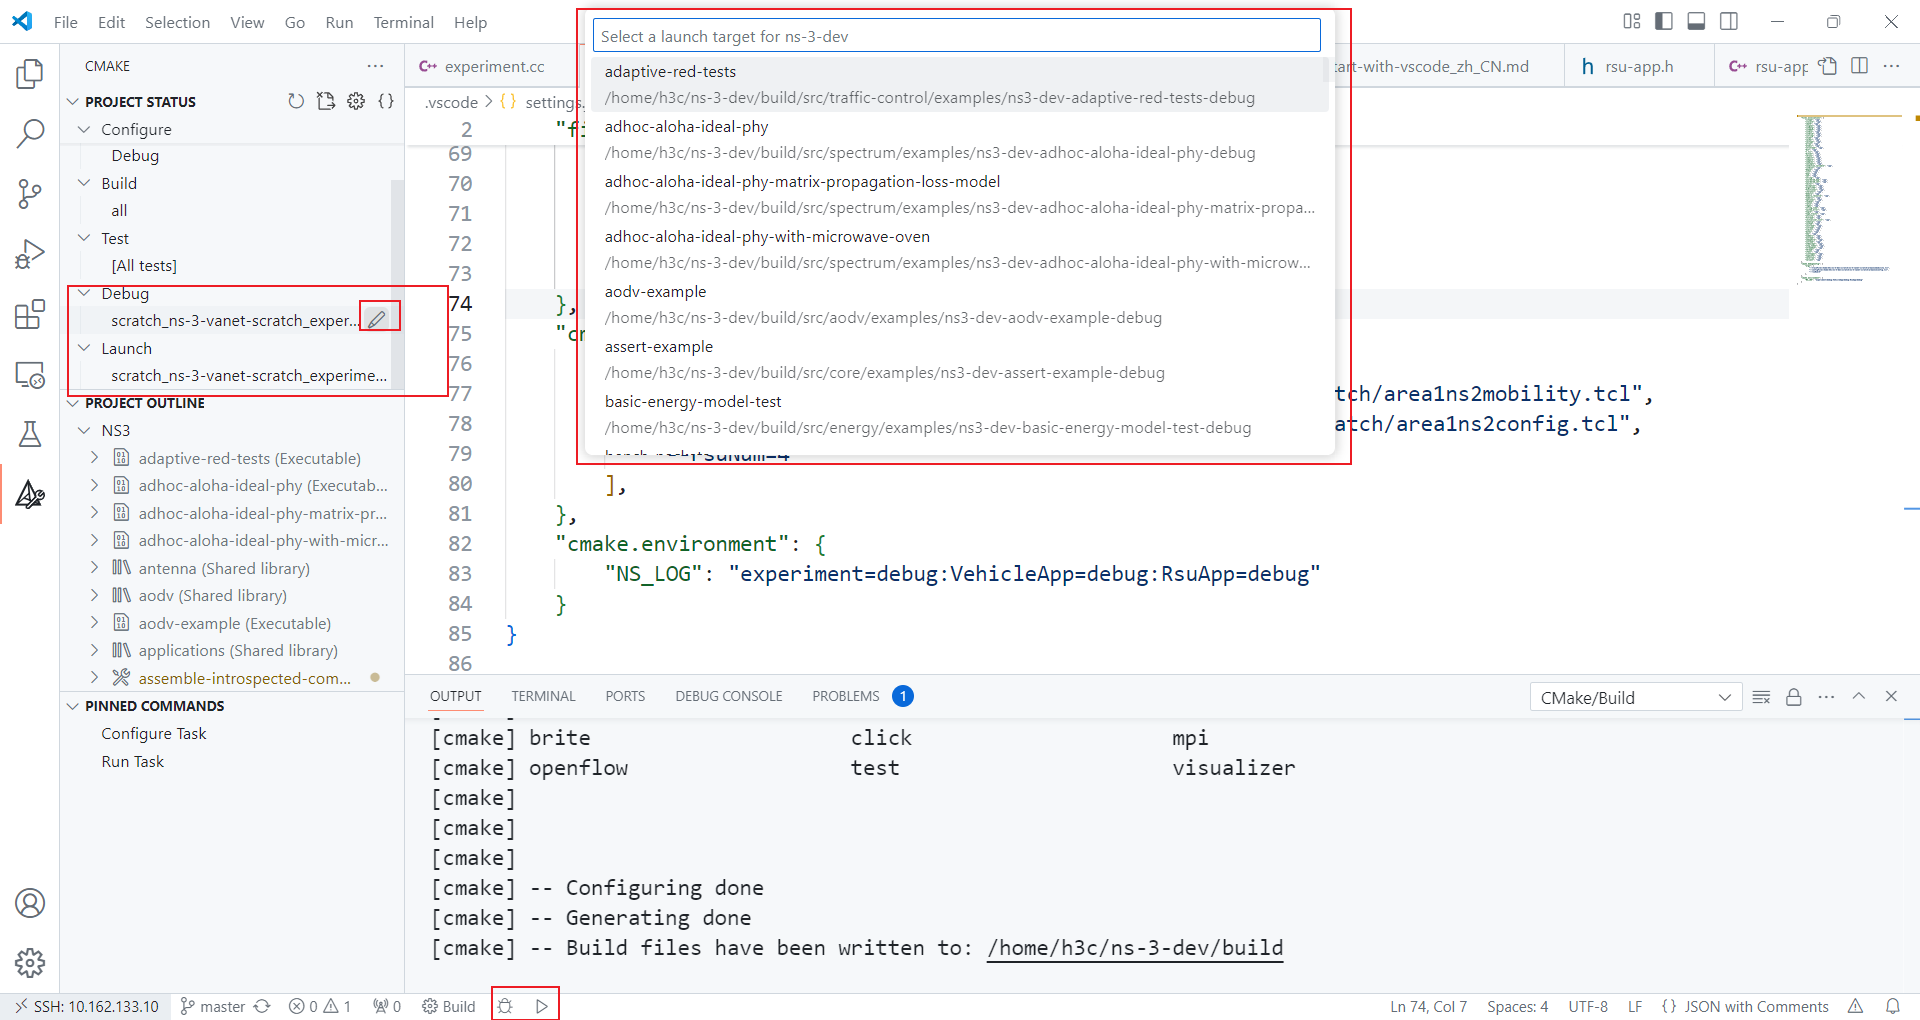
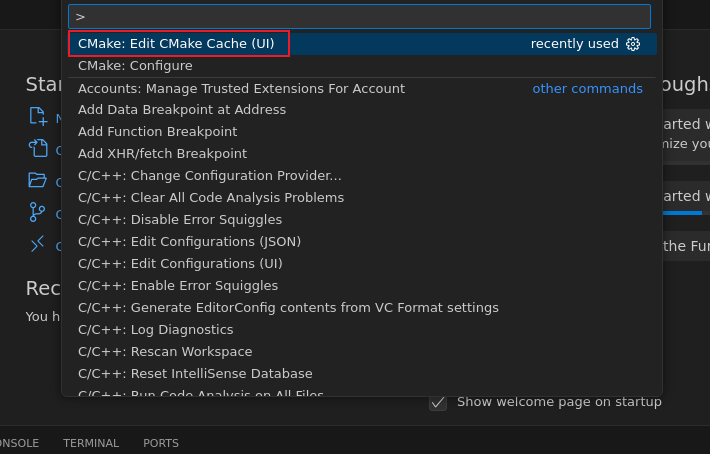
Press Ctrl+shift+P key and select:
Choose existed kit in your computer:
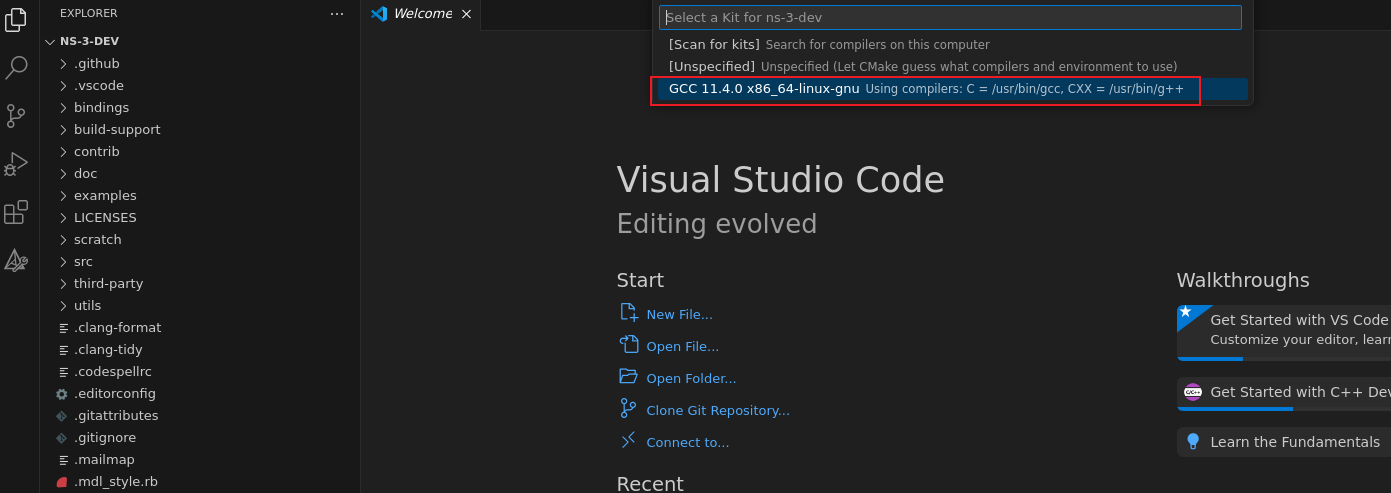
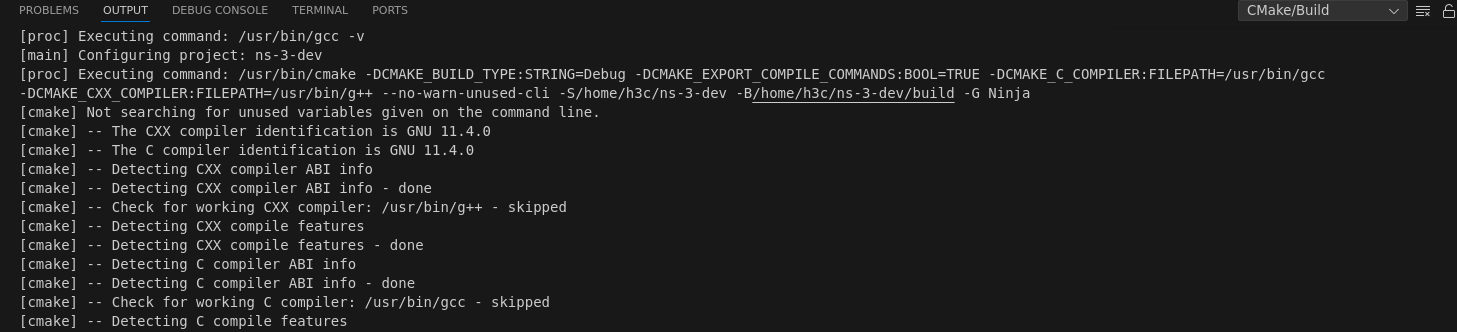
Then you can see cmake begin to work.
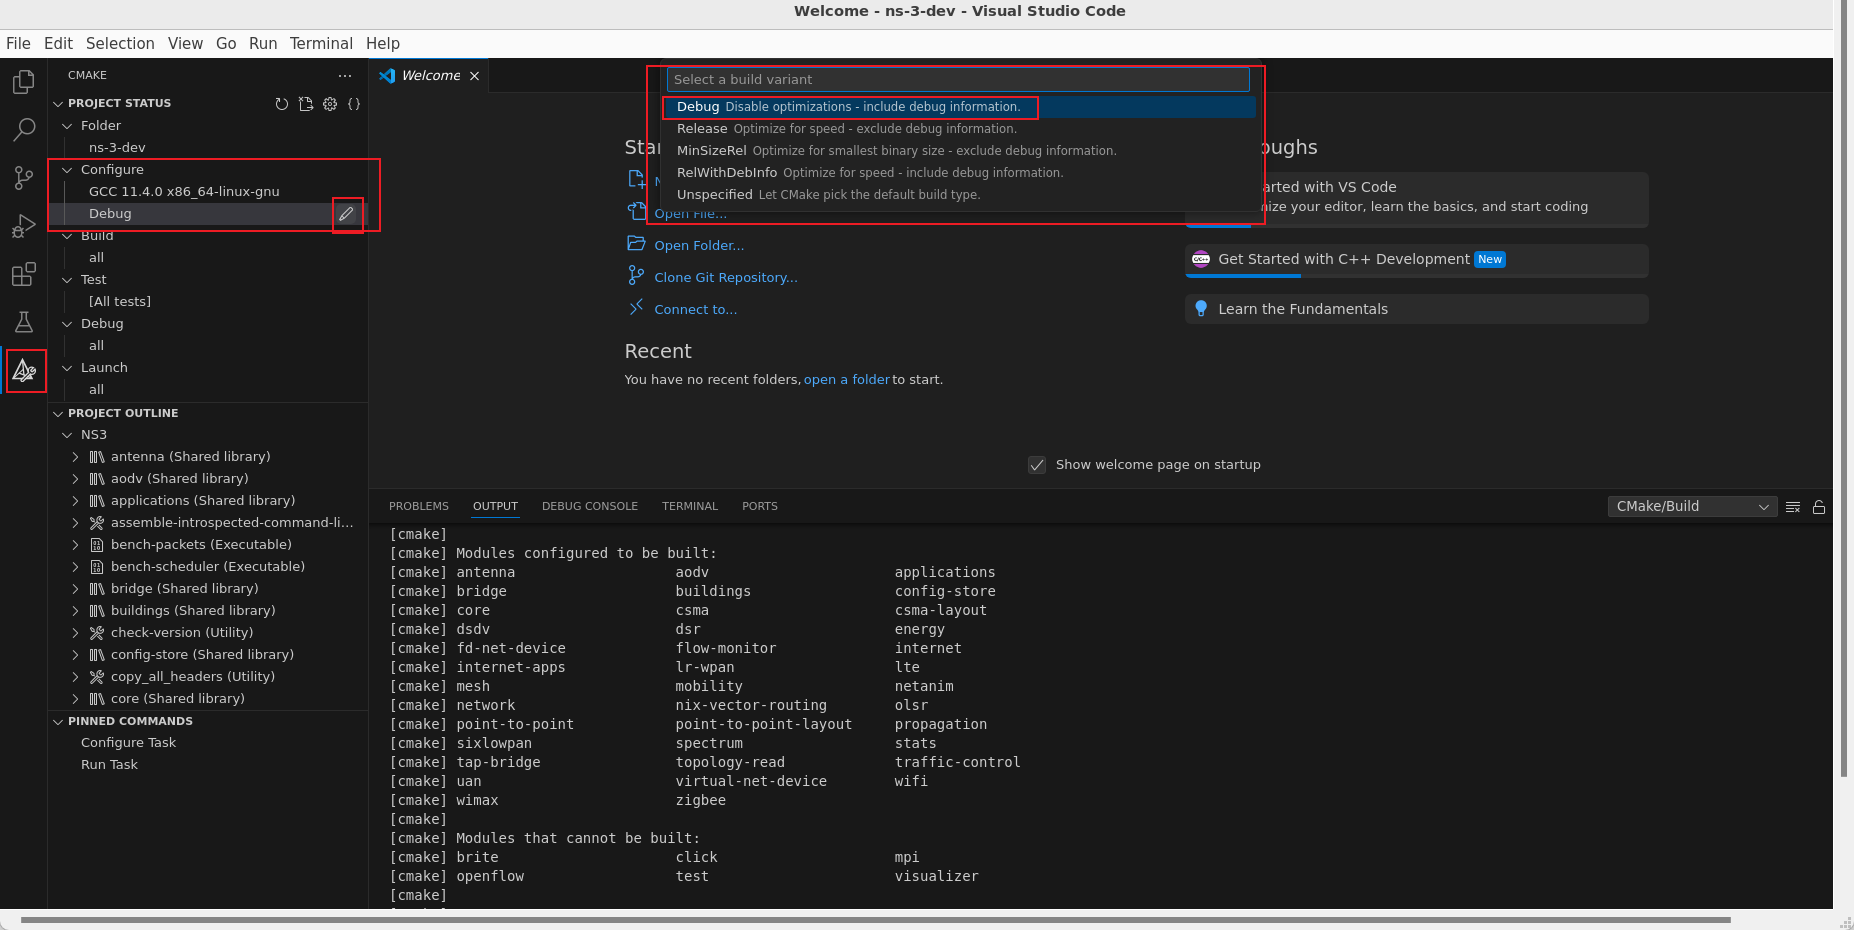
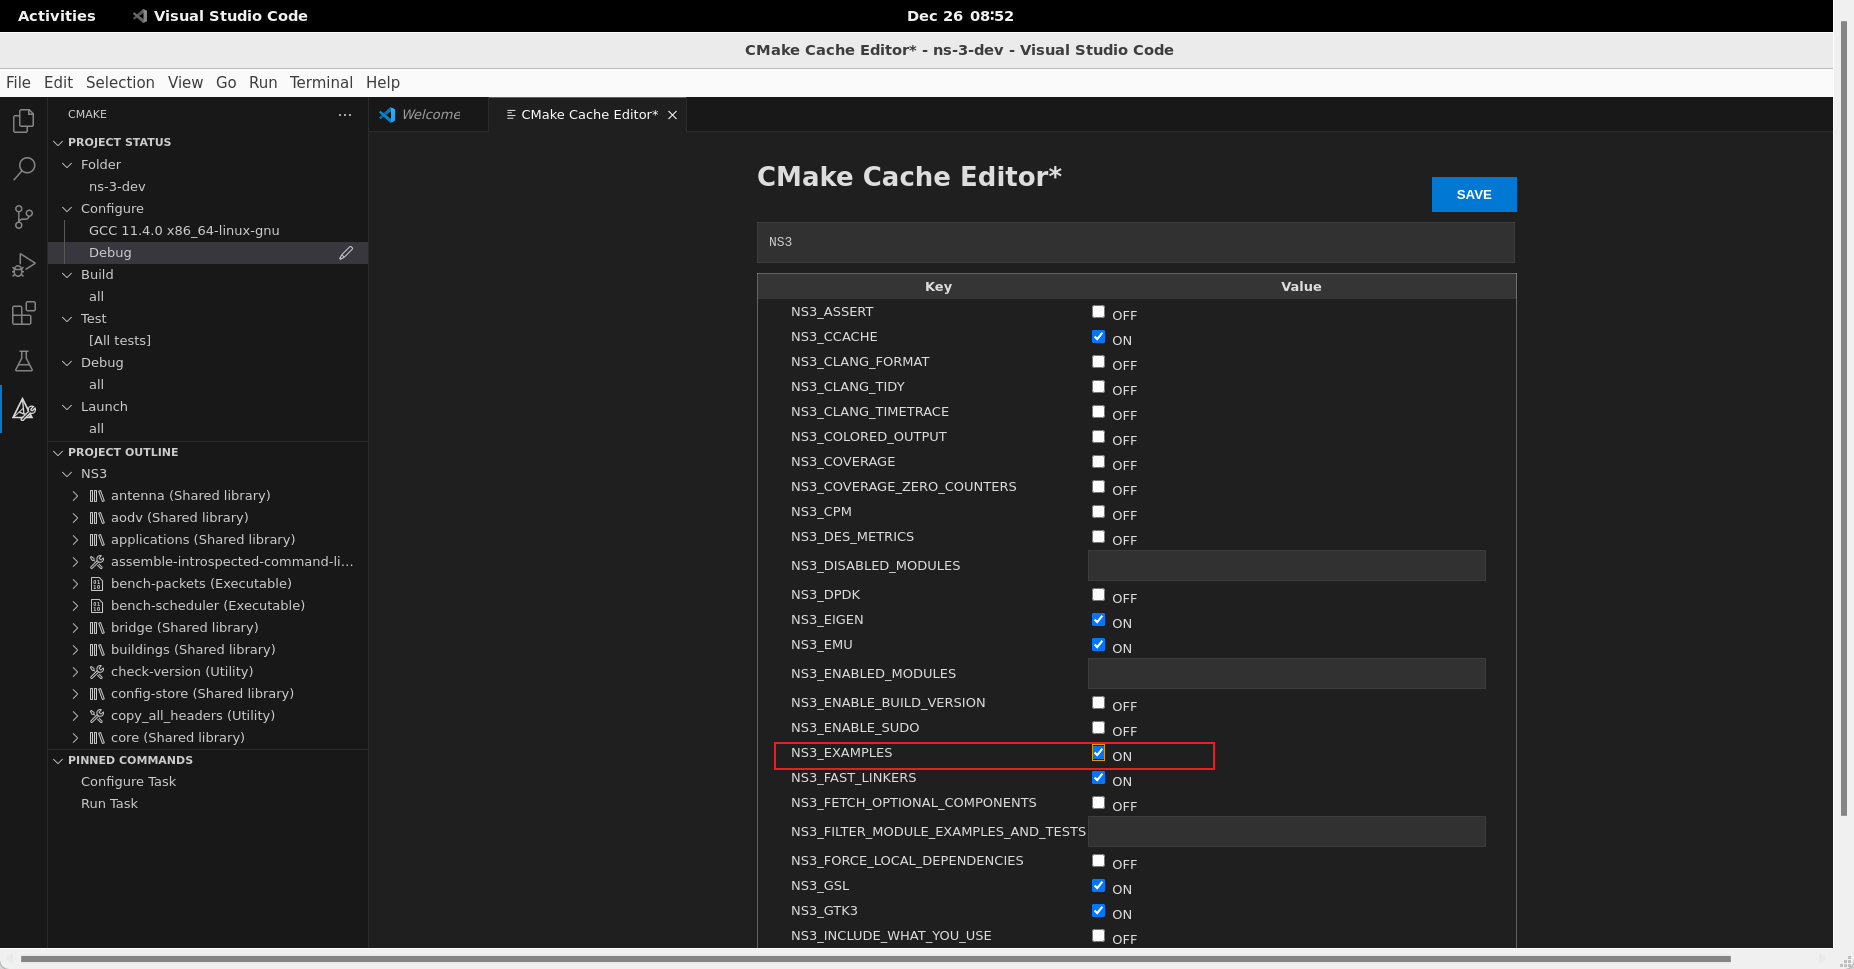
In order to see some output, set the CMAKE_BUILD_TYPE to Debug:
Press Ctrl+shift+P key and select:
In order to build the official examples, set the NS3_EXAMPLES to ON:
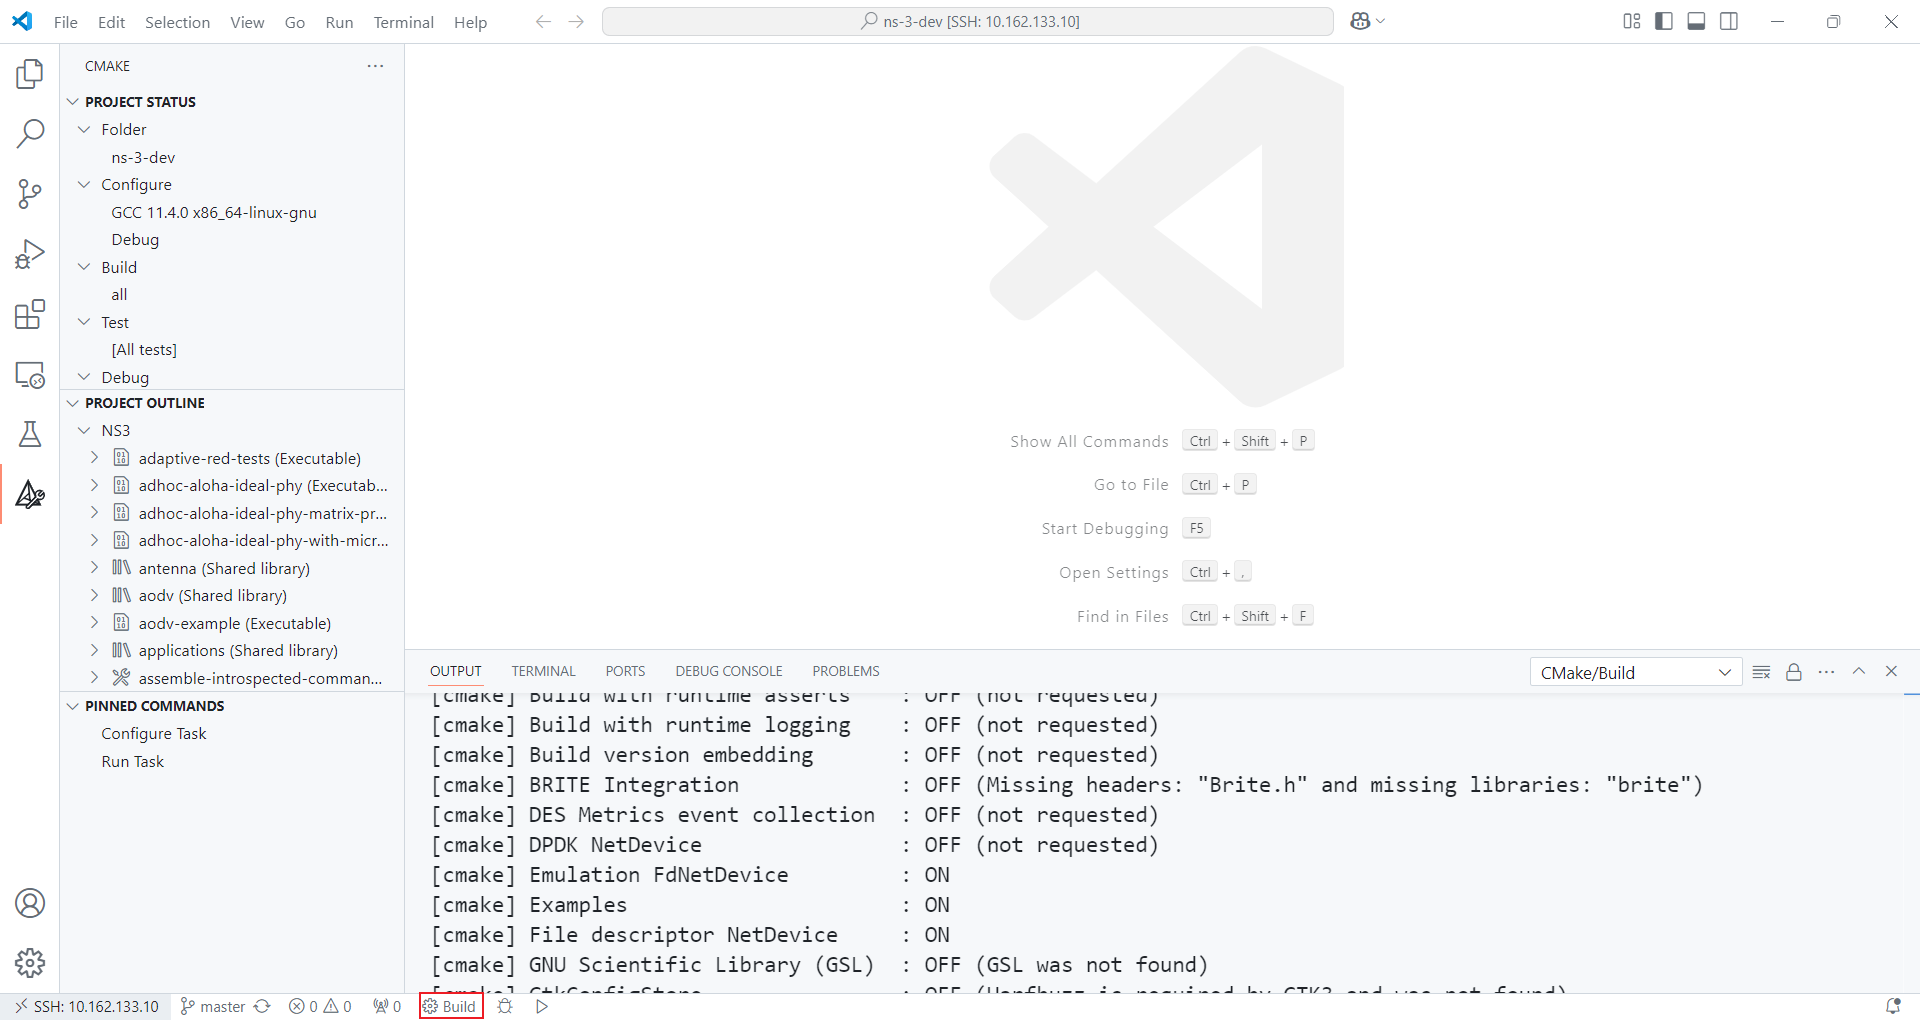
Build the project
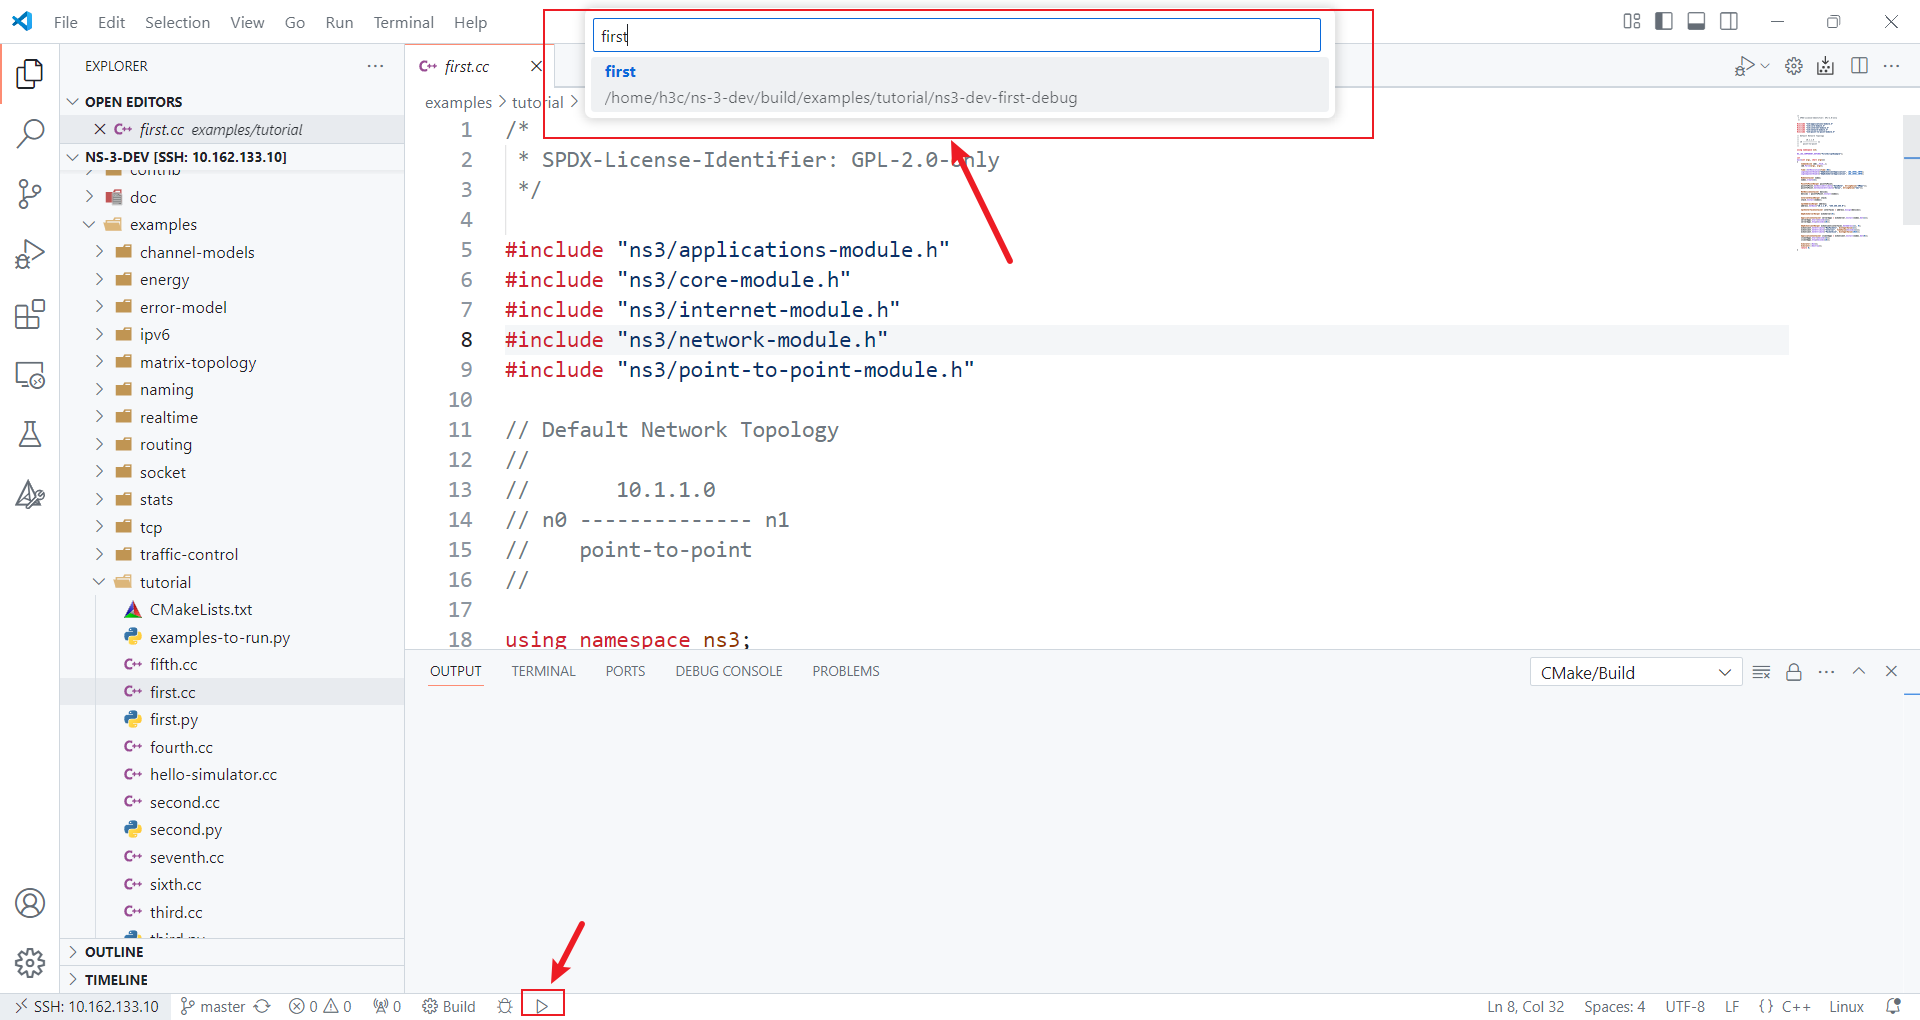
Test ns-3
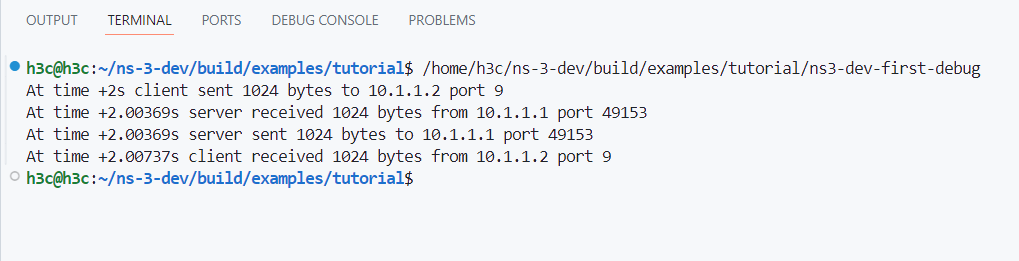
Open examples/tutorial/first.cc , run it.
Other configurations
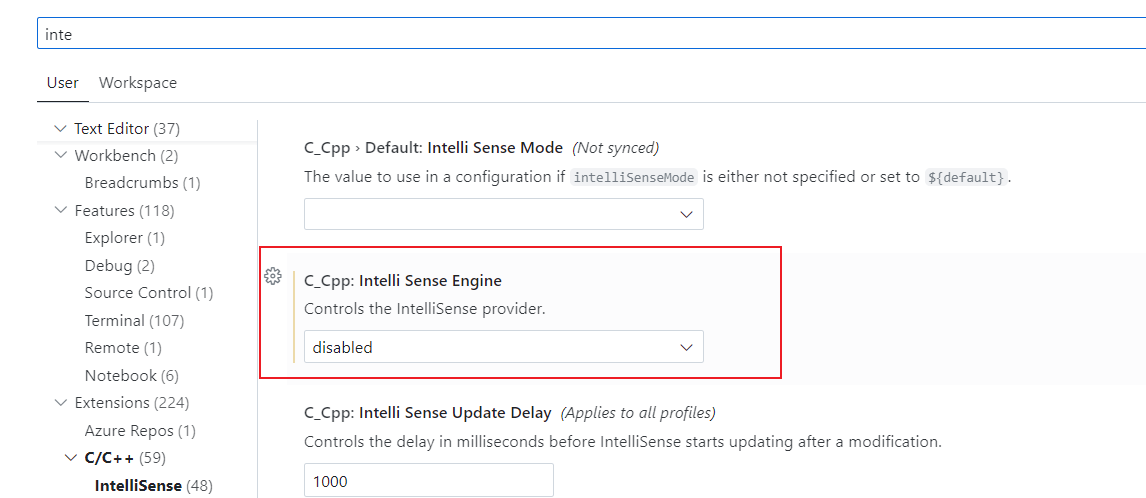
The performance of the original Visual Studio Code C/C++ IntelliSense engine is not very good. We can use the clangd plugin as an alternative.

You also need to ensure that clangd is installed on your system. If not, try:
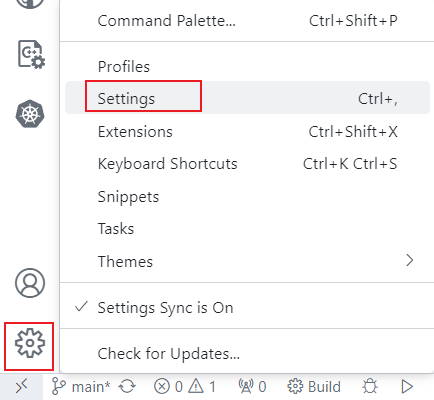
sudo apt -y install clangdThen, disable the original Visual Studio Code C/C++ IntelliSense engine:
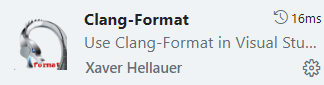
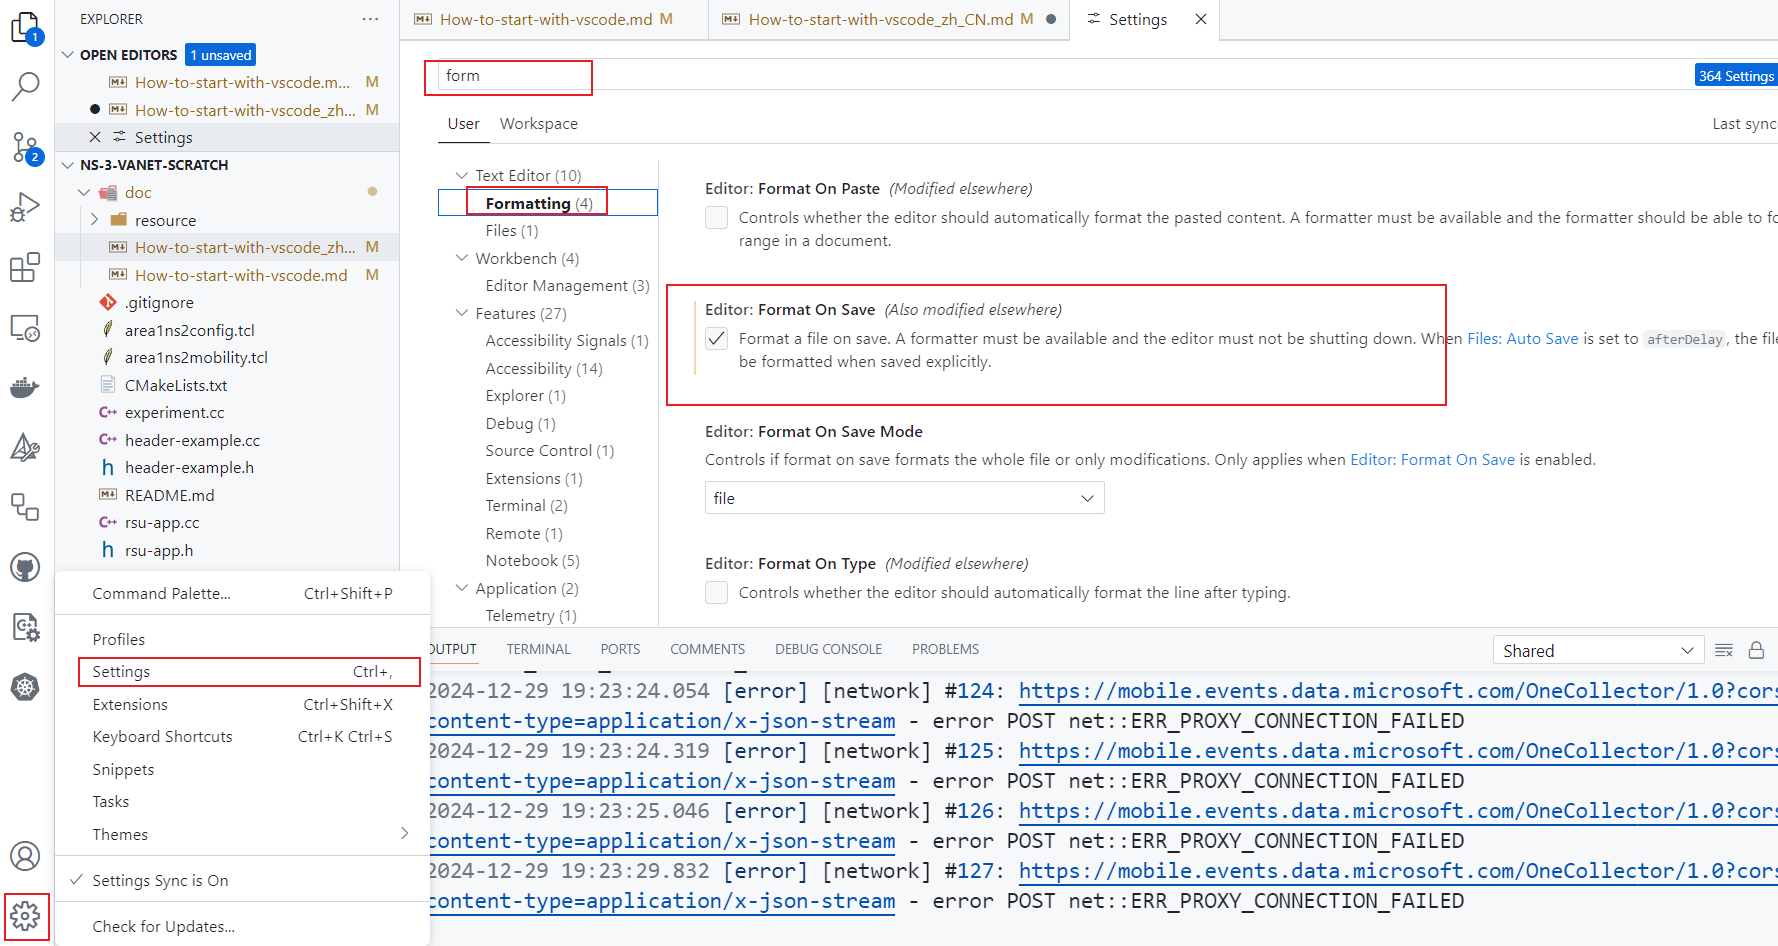
The ns-3 official offers coding styles, you can install some plugins and enable formatting on save:
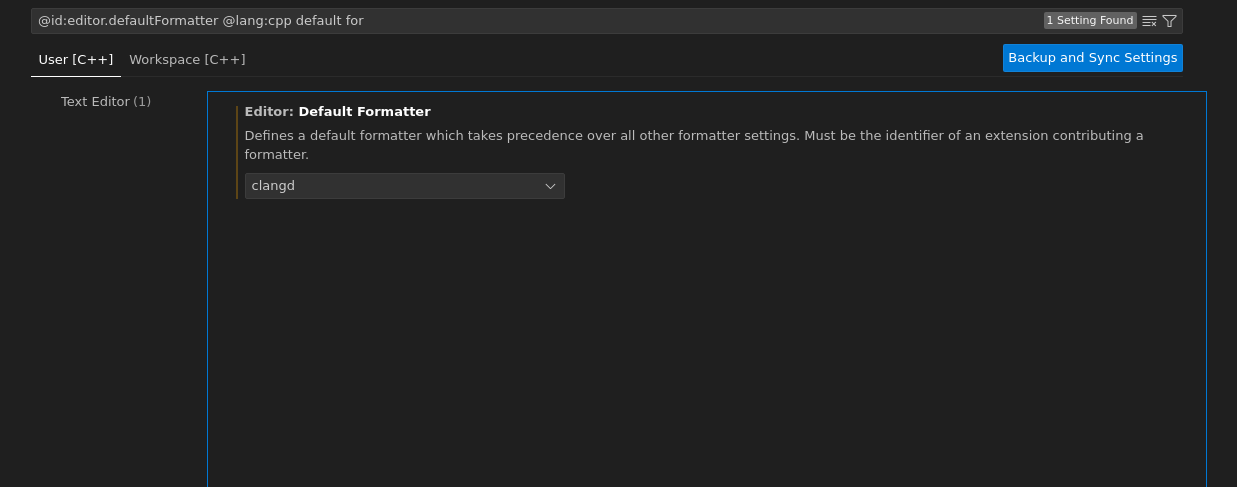
However, if both clangd and Clang-Format are installed simultaneously, the formatter may not work properly because there are two formatters. Here, you can select a default formatter:
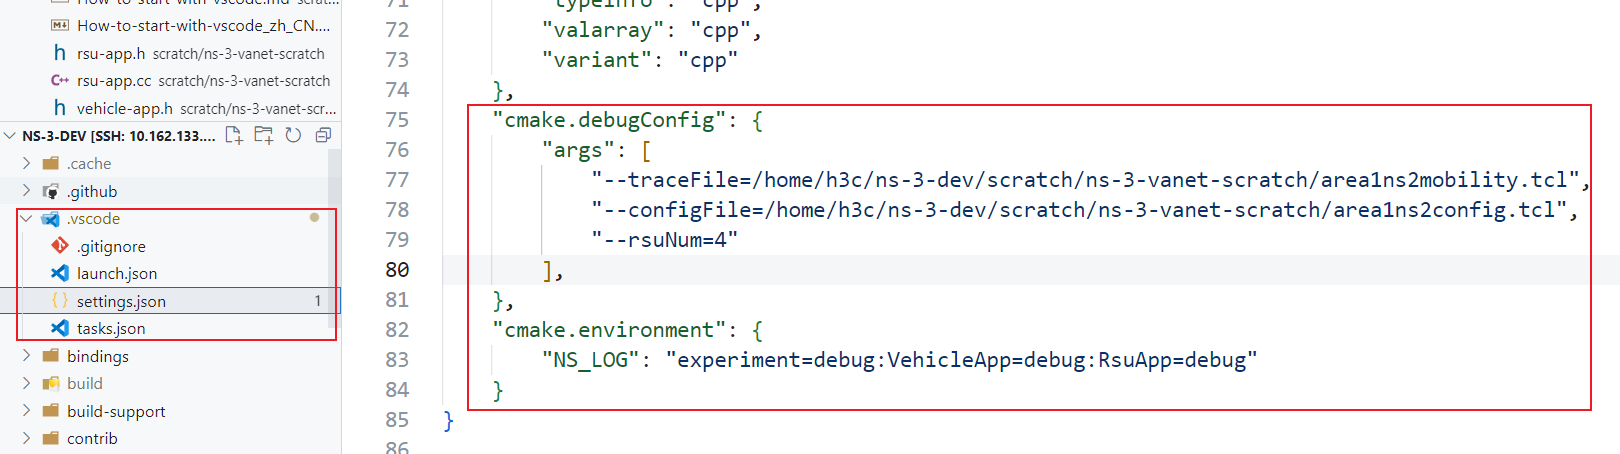
How to pass environment variables and program arguments to the program in Visual Studio Code while using CMake
Add the following configuration to .vscode/settings.json :
    "cmake.debugConfig": {
        "args": [
            "--traceFile=/home/h3c/ns-3-dev/scratch/ns-3-vanet-scratch/area1ns2mobility.tcl",
            "--configFile=/home/h3c/ns-3-dev/scratch/ns-3-vanet-scratch/area1ns2config.tcl",
            "--rsuNum=4"
        ],
    },
    "cmake.environment": {
        "NS_LOG": "experiment=debug:VehicleApp=debug:RsuApp=debug"
    }
How to run or debug program